So, throughout most of my life, I have taken the “safe” route. Not taking many chances, doing things the way they “should” be done, and especially not taking any chances in decorating my house.
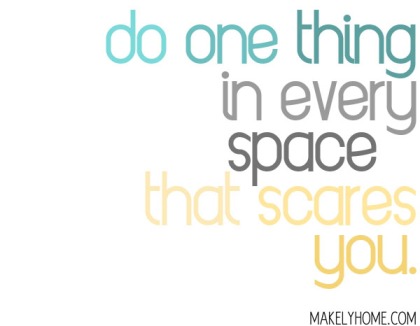
I have always gone the safe route, not wanting to do anything too risky or out of my comfort zone. Then I saw this quote……..
Source
It immediately inspired me. Since I graduated college, I have lived with another person. All of my decorating choices were a compromise. For almost the past two years, I have lived by myself for the first time in my life. It took about a year to realize, this was MY space, and my space only. This may be the only time in my life I will be on my own, able to decorate for ME and no one else. While sitting in my living room, looking at this…….
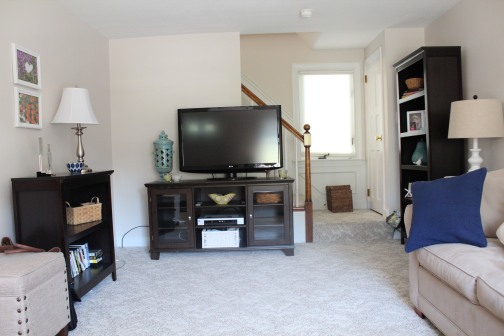
I realized this was the space I wanted to scare me. All of that dark furniture (all brought from my old house, bought for that space specifically) didn’t make this space feel like mine. THIS was where I was going to take my decorating chances.
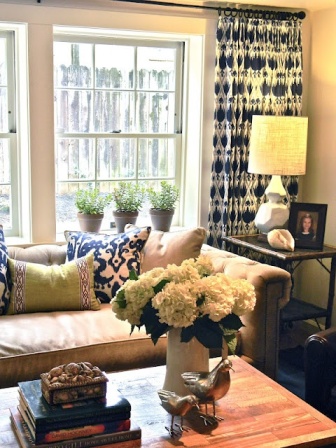
I have always been a fan of light colors, turquoise, tan, white, yellows, but lately I have been drawn to navy, gold, yellow, etc. Then I saw this living room on Pinterest…..
Source
After seeing this, I knew navy and gold/yellow was where I wanted to go.
With all of that heavy furniture, one piece had to go. My TV stand was staying and I loved the tall bookshelf in the corner, so it was the small shelf on the left that got the boot.
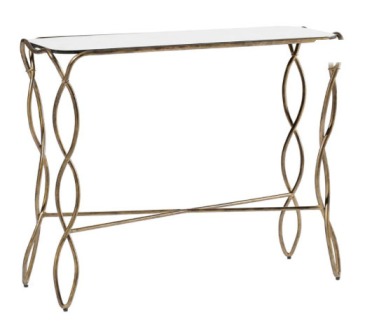
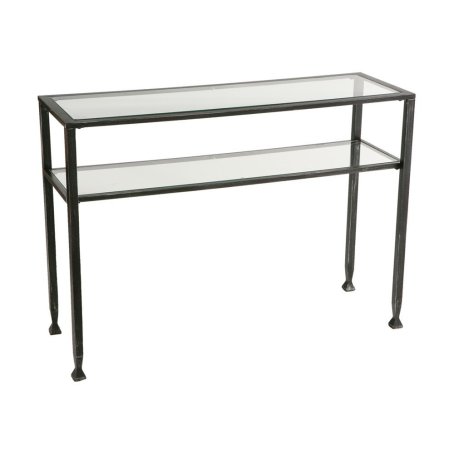
I fell in love with this table…..
Source
But with a $699 price tag, I knew something else had to be done.
I have never, in my life been drawn to the color gold, until recently. This was definitely going to be a risk, outside of my comfort zone, and something that scared me.
I scoured thrift shoppes, HomeGoods and other discount stores and wasn’t finding anything I liked. Then I remembered various gold items floating over blog land, all done with the magic of Rub’nBuff. You may remember I gave my first go with Rub’nBuff on this silver vase. This vase was to practice before I took my skills out on a bigger, more substantial piece.
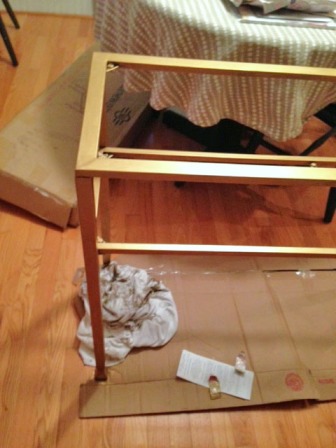
I found the perfect table on Joss & Main. Clean lines, simple, and only $99. BUT they were sold out. Womp. The perfect table was eluding me. I took a chance and looked on Amazon and found the exact same table that Joss & Main was sold out of. For $93!!
I had $65 in cash back bonus to use + free shipping with Amazon Prime, so the final cost of the table was only $33.58. That made me feel better about totally altering the look of the table.
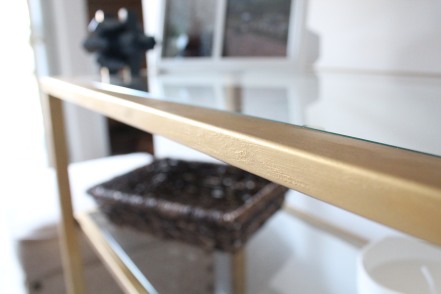
After building the table, I got to work adding the Rub’nBuff
It took two coats to fully cover the table. This time, the best way to “buff” off the excess was to just wipe. No circular buffing, no scrubbing. Just wiping off the excess. This helped limit the number of streaks and prevent the original finish from poking through.

It didn’t take long at all. And when done, the finish was solid, and wasn’t rubbing off.
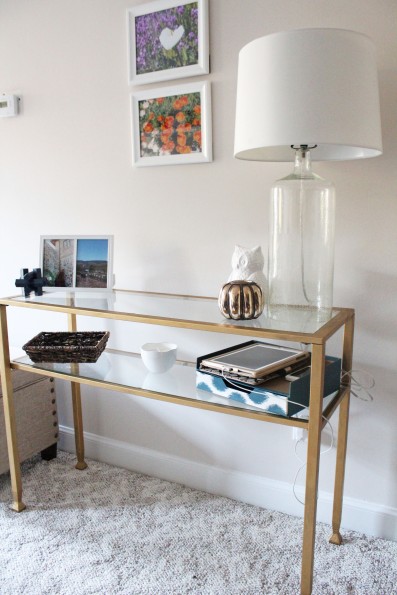
I swapped out the bookshelf for the new table and absolutely love it!!!
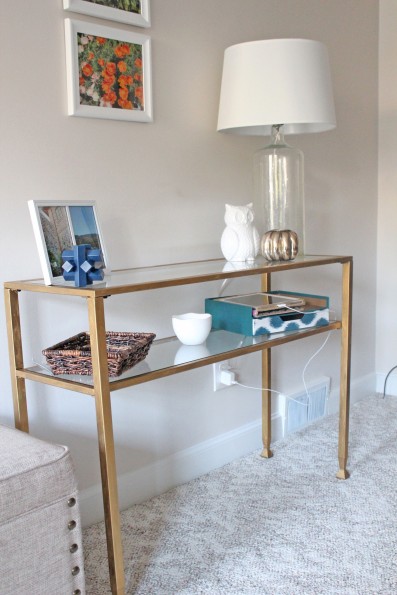
I think it totally helps lighten up the space, taking away the heaviness of all of the dark furniture.
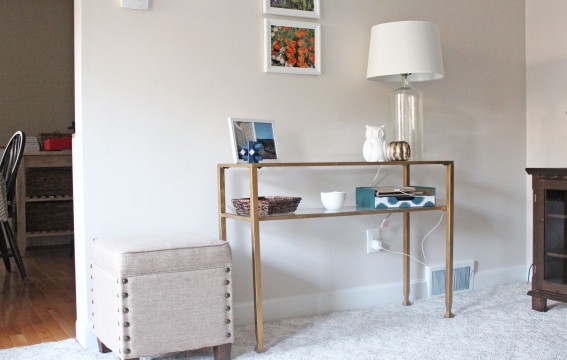
I did a little bit of styling of the space (seriously always the most fun part of any new project!!!)
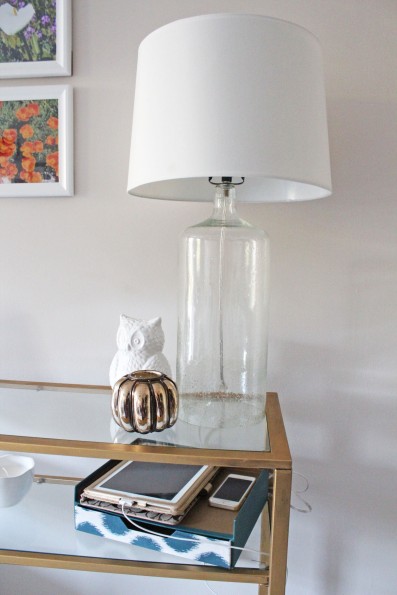
I got all of this from Target. Total Target addict! The lamp was on clearance for $18 and the shade was only $14. This picture doesn’t do the lamp any justice. It is HUGE. And totally a bargain at $18. I got this Jonathan Adler desk organizer to hold some necessary living room clutter and also to use as a charging station for my iPad and phone. I always charge them at this spot and this helps corral the mess!
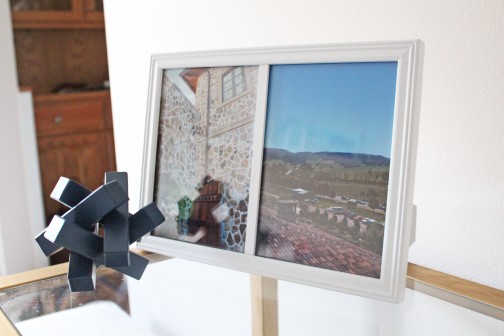
I absolutely love pictures and wanted to find the perfect place for these pictures from my trip to Napa last year. Boy do I wish this table was in a house I owned out in Napa!! I got this geometric shape from Target for $3. I gave it two coats of Navy spray paint and it was perfect for the space.
So, was I scared to have a gold table in my house? Yessir! But am I thrilled to have taken a chance and go outside of my comfort zone?? ABSOLUTELY!!!
What decorating risks have you taken lately?!?!?!